

Cordelia has made it to your kitchen and now it’s time to get startered!
Please consider purchasing my gluten-free sourdough course, which includes detailed instructions for maintaining the starter, video for certain bread-making steps, guides on choosing equipment, and troubleshooting help for proofing and properly hydrating the starter and bread dough!
This page will be turning into an online course—included with purchase of Cordelia Sourdough Starter! Look for that early summer 2024
Equipment for starter:
One package of Cordelia Sourdough Starter
One glass or ceramic bowl(NO stainless steel!)
Scale weighing in grams
Authentic Foods or Anthony’s Fine Brown Rice Flour
Water that is free of chemicals like chlorine or fluoride.
Glass jar with lid or cover roughly 1 quart
Example Schedule:
Friday 8 am: revive sourdough starter.
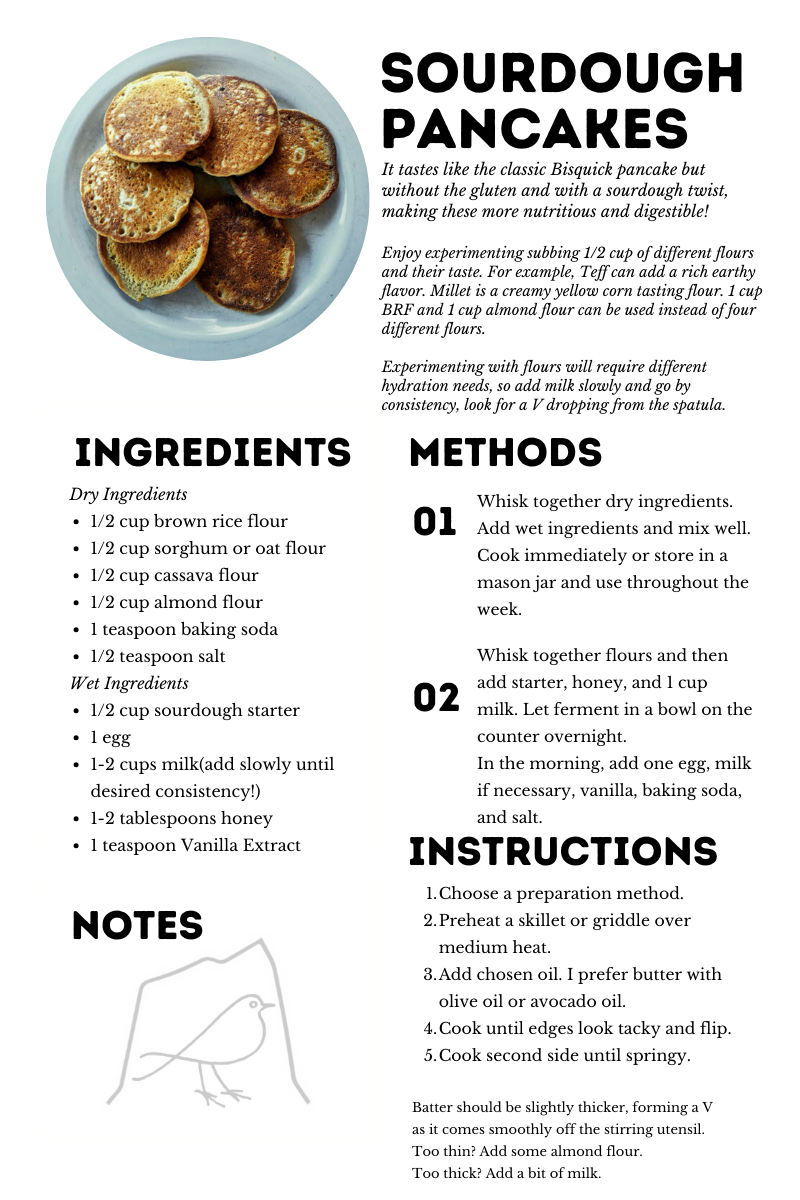
Friday 7 pm: remove 1/2 cup starter and transfer to a jar with lid and put in the fridge. Make pancake batter.
Saturday 8 am: Add the rest of the pancake ingredients and enjoy your first Cordelia sourdough!
Saturday 10 am: Remove starter from the fridge and do first feeding!
Saturday 4 pm: Whip up your first loaf of bread.
Sunday 7 am: Preheat Oven and bake your first loaf of bread.
Sunday Dinner: Eat the entire loaf for dinner!
Remember, this is only an example. Your times may vary based on the temperature of your kitchen.
Let’s revive Cordelia
Revive your starter (opt. in the morning) by following these directions:
Open your sealed package of Cordelia Sourdough Starter and pour it into a medium-size glass or ceramic bowl. (The contents are 50 grams dried starter).
Add 160 grams of filtered water to the bowl of the dehydrated starter.
Gently stir and enjoy the aroma of baked bread as the starter dissolves into the water.
Add 75 grams Authentic Foods Brown Rice Flour and stir thoroughly, whipping air into the starter batter.
Scrape down the sides and cover with a tea towel or plate.
By dinner time your Cordelia starter will be puffed up and even have some bubbles. If you’ve used a clear glass bowl you can see small aeration. The consistency will be light and airy just like mousse.
8-12 hours from the first set of steps, scoop out a half cup of now active starter and add it to a mixing bowl.
Transfer the rest of the starter to a straight-walled glass jar about 32 oz in size. A quart mason jar will do for first. My favorite jars are large glass Adam’s Peanut butter jars. There now will be approximately 130 grams of starter in the jar.
Cover with a lid.
Now mix up a batch of sourdough pancakes for tomorrow morning!
Now that you have enjoyed your first taste of Cordelia, it is time to make a loaf of bread!
Feed your starter 100 grams of warm filtered water and 80 grams of Brown Rice Flour. Watch a video where I do a simple feeding but be sure to follow step 3 after feeding!
Cover loosely and leave until the top is domed, the side is aerated and it smells strongly of bread. 3-8 hours.
The trickiest part of sourdough is catching the starter at just the right time. It is essential to use the starter before it deflates and falls. Try to use gluten-free sourdough once active, domed, and a bit bubbly, but well before it peaks. Either way, still make the bread!
Once your Cordelia Starter is ready, mix up some bread!
Equipment for bread:
Ingredients for bread:
Authentic Foods Brown Rice Flour
Authentic Foods Sorghum Flour
Authentic Foods Potato Starch
Authentic Foods Tapioca Starch
Raw Honey
Fine natural salts like Redmond Real salt or fine sea salt
Two mixing bowls
Digital scale weighing in grams
Spatula
7” round boule Proofing banneton or 7” bowl lined with a smooth tea-type towel
Enamel or cast iron dutch oven/combo cooker safe to 500°
Filter for purifying water if necessary

About the Basic Bread Recipe
BASIC bread recipe which does not include oats or seeds.
A tougher, denser loaf but few ingredients make it quick.
Perfect loaf for eating fresh at a gathering.
Potato starch can be replaced with half tapioca and half cassava flours.
About the Simple Bread Recipe
Light Buckwheat flour can replace oat flour.
Not as tough, dense, and springy.
Keeps well in parchment to enjoy for days after baking.